 Postozo
How to connect Listmonk to Postozo
Paste a few details from Listmonk and start scheduling. This guide shows where to find each detail, each screen in Postozo, and how to fix common errors.
What you need before you start
- Your own Listmonk server, version 4 or newer.
- An API user with access to the lists you want to send to, and its token.
Listmonk connects with details you copy from Listmonk (a key, token or app password). Postozo checks them with Listmonk before saving and stores them encrypted.
Connect Listmonk step by step
Step 1. Open Add Channel
Sign in to Postozo. On the Calendar, press Add Channel at the top of the channel list. A window opens with a tile for every network. Find the Listmonk newsletter tile and press it. Each tile also has a How to connect link that opens this guide.
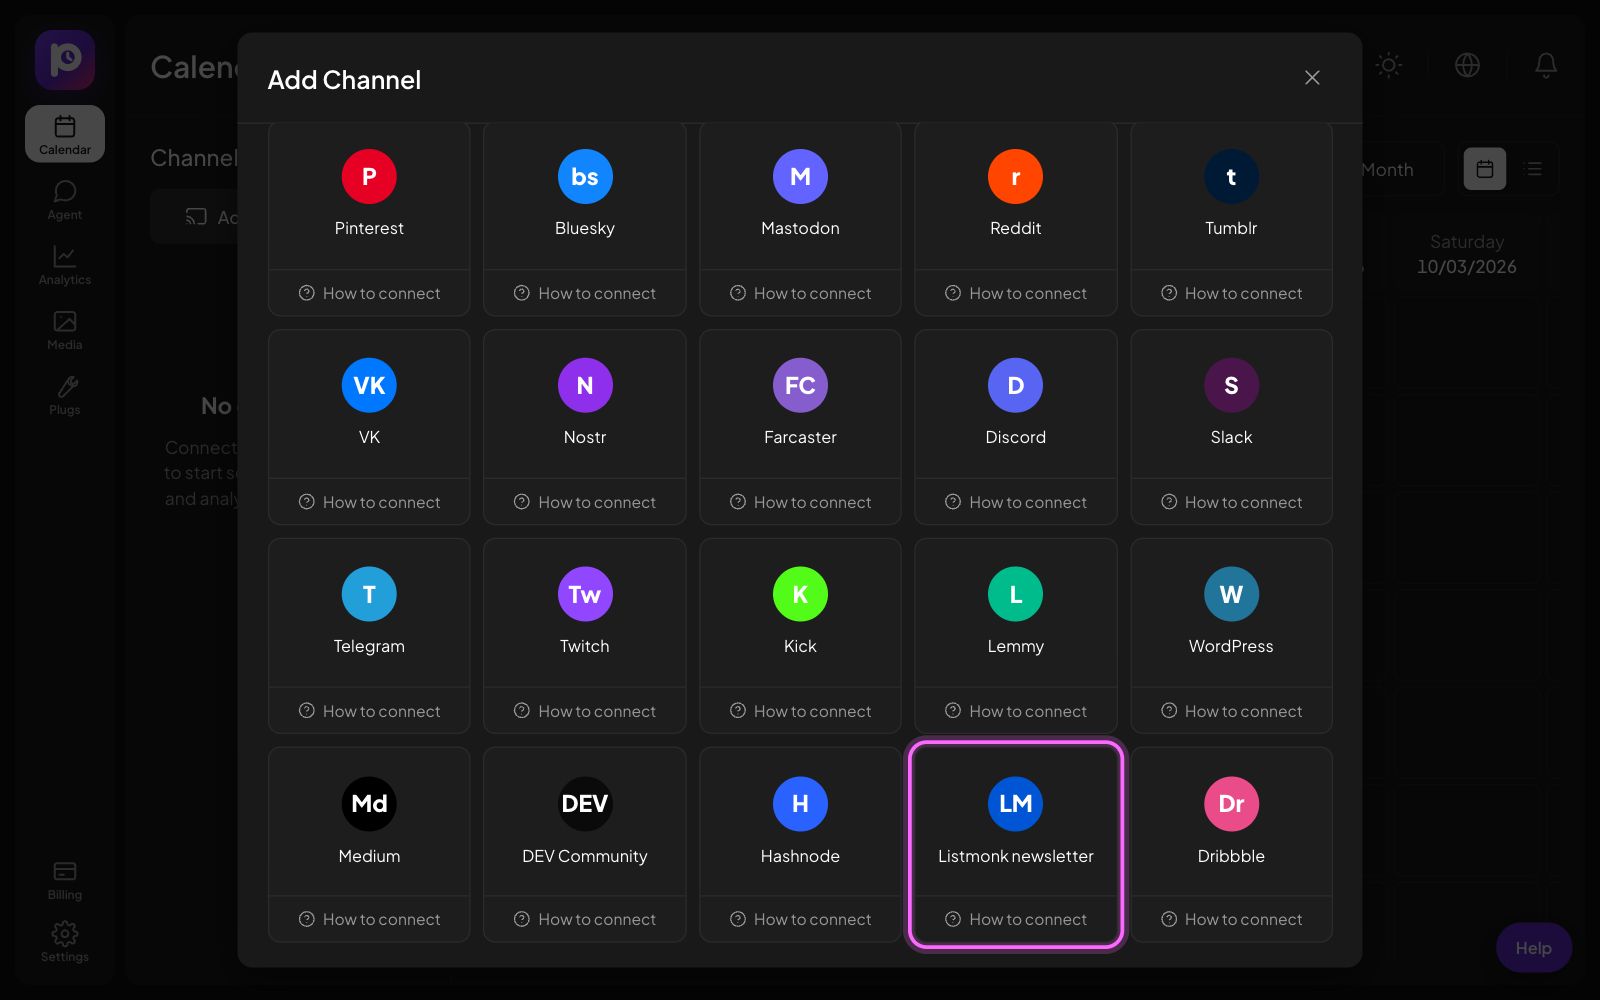
If the tile says Coming soon on this server, the server you use has not added its Listmonk app keys yet. Ask the person who runs your Postozo server. On postozo.com this is done for you.
Step 2. Fill in your Listmonk details
A form opens. It asks for 3 details: Listmonk address, API user, API token. Under each field, press Where do I find this? to see the exact steps. We copy those steps below.
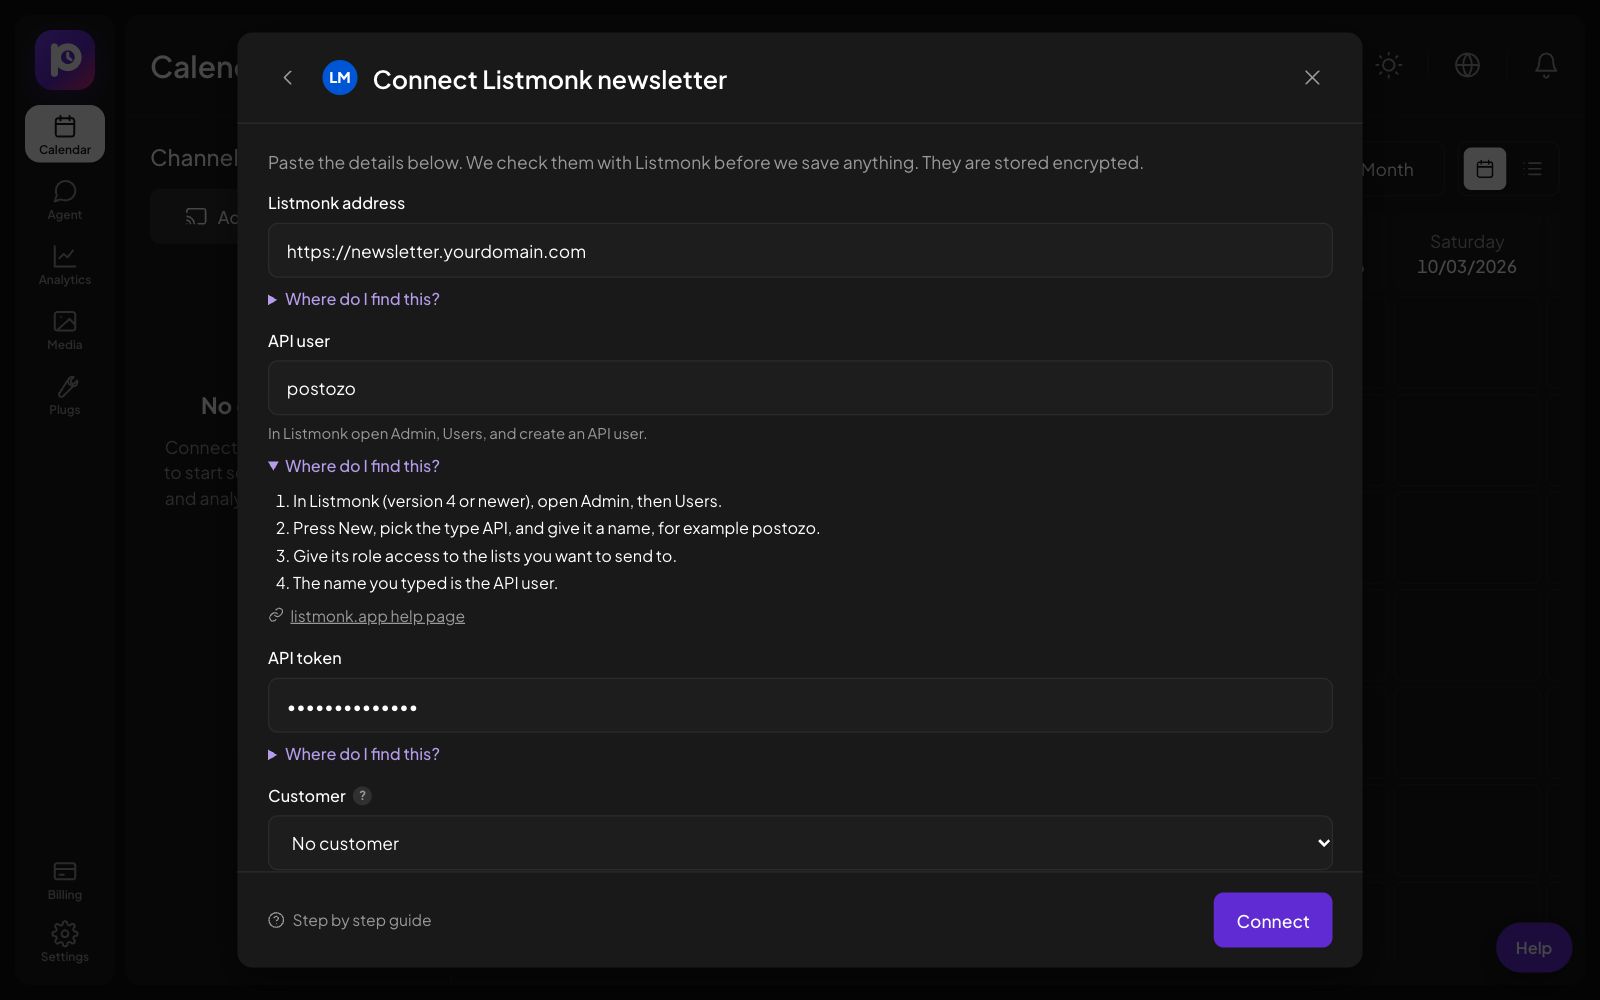
Listmonk address
- The address where you open your Listmonk admin, without /admin.
- For example https://newsletter.yourdomain.com.
API user
- In Listmonk (version 4 or newer), open Admin, then Users.
- Press New, pick the type API, and give it a name, for example postozo.
- Give its role access to the lists you want to send to.
- The name you typed is the API user.
API token
- Listmonk shows the API token once, right after you create the API user.
- Copy it and paste it here. If you lost it, create a new API user.
Step 3. Press Connect
Postozo checks the details with Listmonk before it saves anything. If something is wrong, the form stays open and shows what to fix. Nothing is saved until the check passes. The details are stored encrypted.
Step 4. Check the new channel
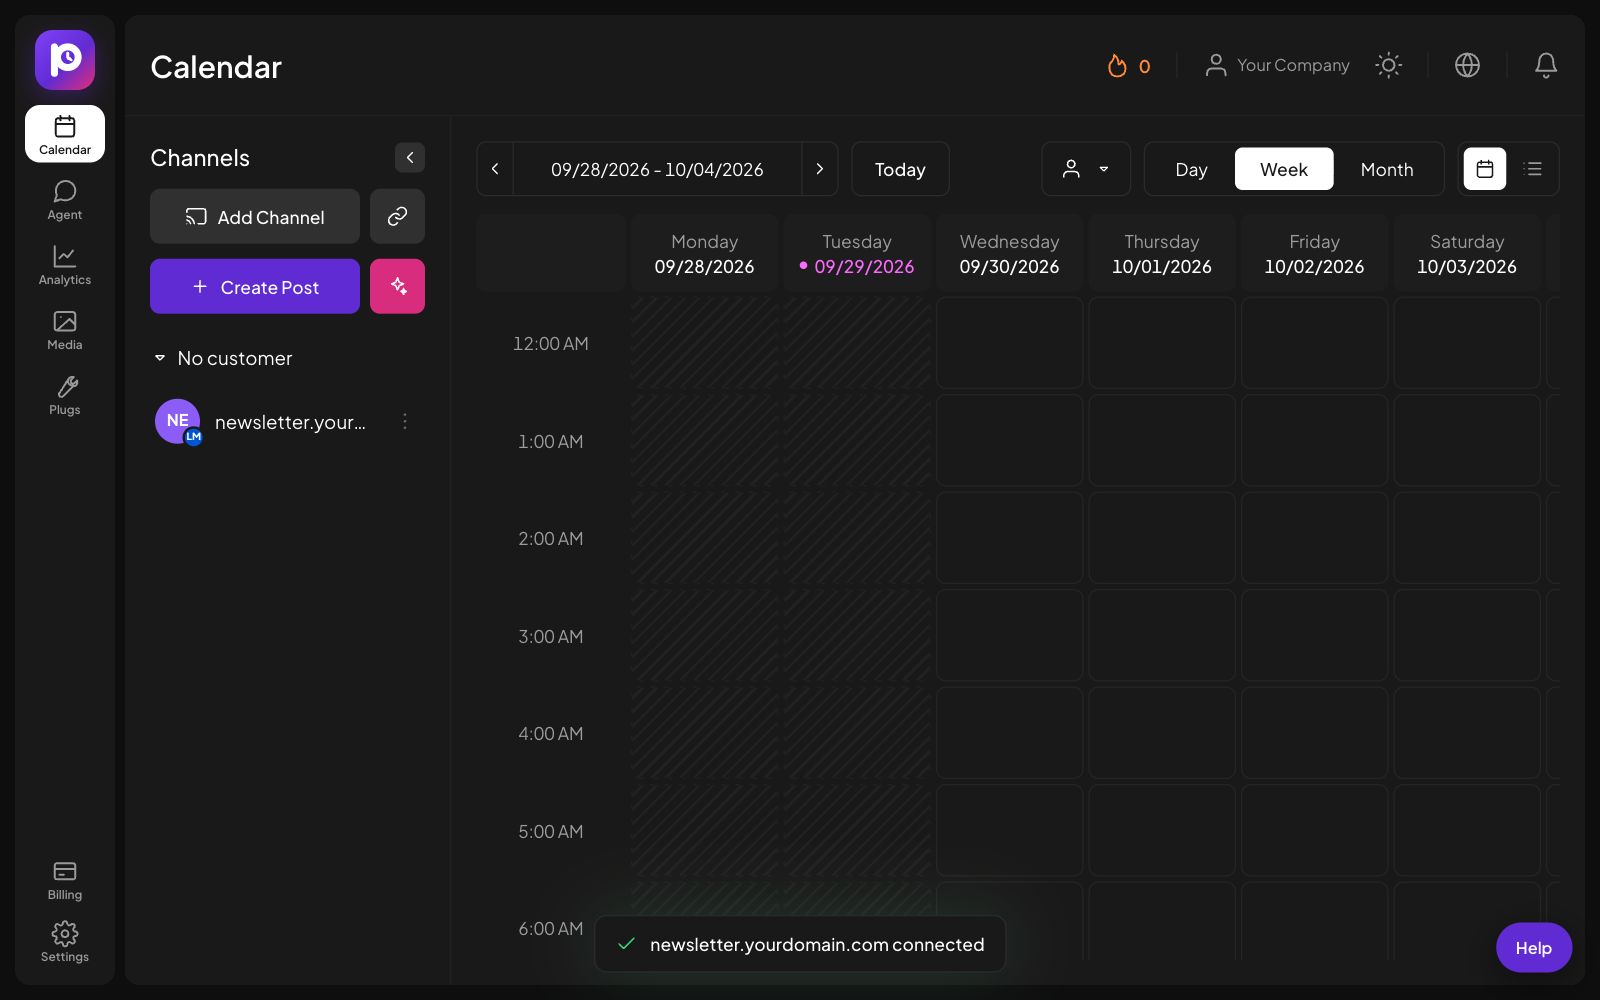
Back on the Calendar, the new channel shows in the channel list on the left, with a small Listmonk badge on its picture. A message at the bottom says it is connected. You can now pick it in the post editor.
Step 5. Set your preferences
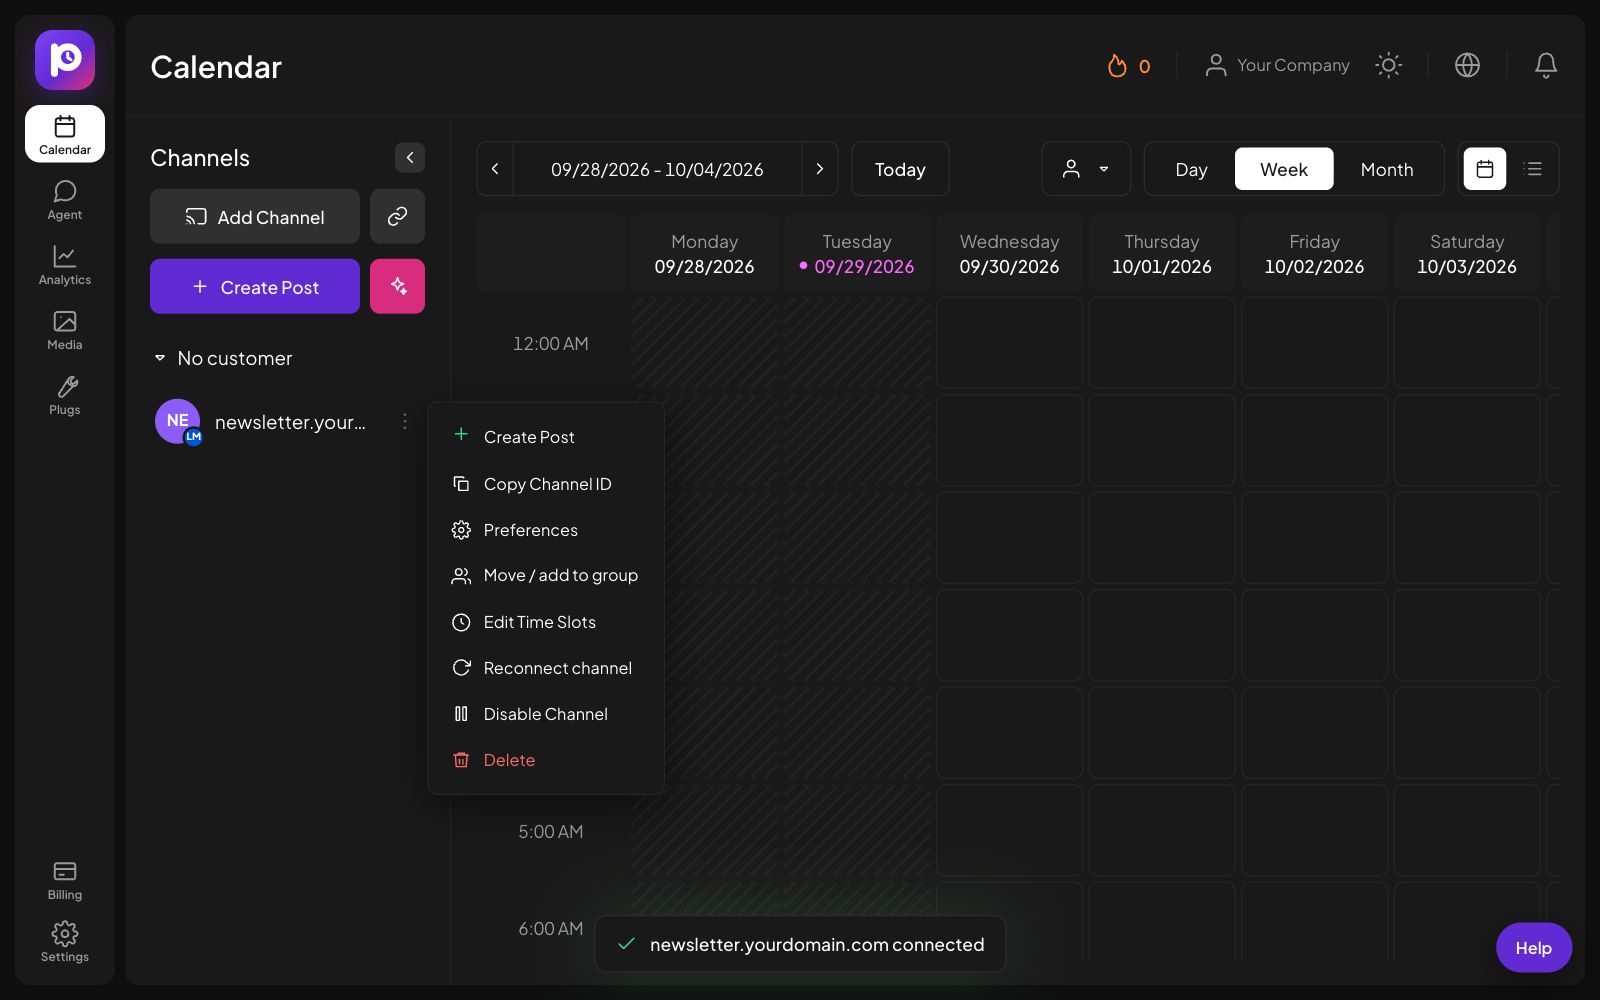
Press the 3 dots next to the channel to open its menu. From here you can set Preferences (default settings for every new post on this channel, like Email subject, List IDs, Send right away), edit time slots, move the channel to a customer, reconnect, turn it off or delete it.
Common errors and how to fix them
| What you see | What to do |
|---|---|
| "Listmonk did not accept that user and token" | Check the API user name and token. If you lost the token, create a new API user. |
| The campaign has no list | Add at least 1 list ID in the post settings. |
| A red message under a field | The value does not have the right format. The message says what it should look like. |
| "We could not reach Listmonk right now" | Listmonk did not answer. Wait 1 minute and press Connect again. |
| "Your plan allows N channels" | You reached the channel limit of your plan. Remove a channel you do not use, or upgrade in Billing. |
How to reconnect
If the Listmonk details stop working (for example you deleted the key or changed the password), Postozo marks the channel with a warning and pauses its posts. Press the 3 dots next to the channel, then Reconnect channel. The same form opens. Paste the new details and press Reconnect. The channel keeps its posts, time slots and preferences.
How to disconnect Listmonk
Press the 3 dots next to the channel, then Delete. Postozo removes the channel and deletes its stored details right away. Upcoming and draft posts for that channel are removed too. Posts that are already live stay on Listmonk. You need the admin or owner role in your workspace to delete a channel.
To cut access on the network side as well, delete the key, token or app password you created there.
Want to pause instead? Choose Disable Channel in the same menu. Its posts wait until you turn it back on.
What you can post on Listmonk
Sends an email campaign. Needs a subject and at least 1 list. The text becomes the email body.
Read more on the Listmonk channel page.
More connection guides
Questions
Does it send right away?
Only if you turn on Send right away. Otherwise the campaign is saved as a draft in Listmonk.
Which list IDs do I use?
The numbers of your Listmonk lists. The lists tool on the channel shows them.
Does connecting Listmonk cost extra?
No. There is no extra charge per network. Each connected account counts as 1 channel toward the channel limit of your plan.
What if the Listmonk tile says Coming soon on this server?
The server you use has no Listmonk app keys yet. The server admin adds them in Admin, Networks.
Connect Listmonk now
Create your Postozo account and add your first Listmonk channel in a few minutes.
Create your free account